

Transform Your Space: The Ultimate Guide to LED Strip Lights for Ceilings
Thinking about jazzing up your ceiling? LED strip lights for ceiling installations are a pretty neat way to do it. They're not just for under cabinets anymore, you know. We're talking about how these bendy lights can totally change the vibe of a room, making it look more modern or just super cosy. It's easier than you might think to get them installed, and they don't use much power either, which is always a bonus. This guide is going to cover all the basics, from picking the right lights to getting them stuck up there.
Key Takeaways
- Choosing the right type of LED strip lights for your ceiling is important, whether you want a single colour, or fancy changing colours with RGB options.
- Accurate ceiling measurements are a must before you buy any lights to make sure you get the right amount.
- Planning your layout and figuring out the power needs beforehand will save you a lot of hassle during installation.
- Preparing your ceiling surface properly, like making sure it's clean and smooth, helps the LED strips stick well.
- Using aluminium channels or diffusers can help hide the wires and give your ceiling LED strip lights a much tidier, professional look.
Understanding LED Strip Lights for Ceilings
Right then, let's get stuck into LED strip lights for ceilings. They're a pretty popular choice these days, and for good reason. They can really change the feel of a room, making it look more modern or just giving it a bit of a cosy glow. It's not just about sticking a few lights up; it's about how you use them to make your space look and feel better. We'll cover the basics here so you know what you're dealing with before you even think about buying anything.
Types of LED Strip Lights Available
So, you've got a few main types of LED strips to choose from, and they all do slightly different things. It's worth knowing the difference before you get too far down the line.
- Single Colour LED Strips: These are the simplest. They just give off one colour of light, usually white (though you can get them in other colours too). You pick the shade of white you want – like a warm, cosy yellow-ish light or a bright, crisp white – and that's what you get. They're great if you just want some general, consistent lighting.
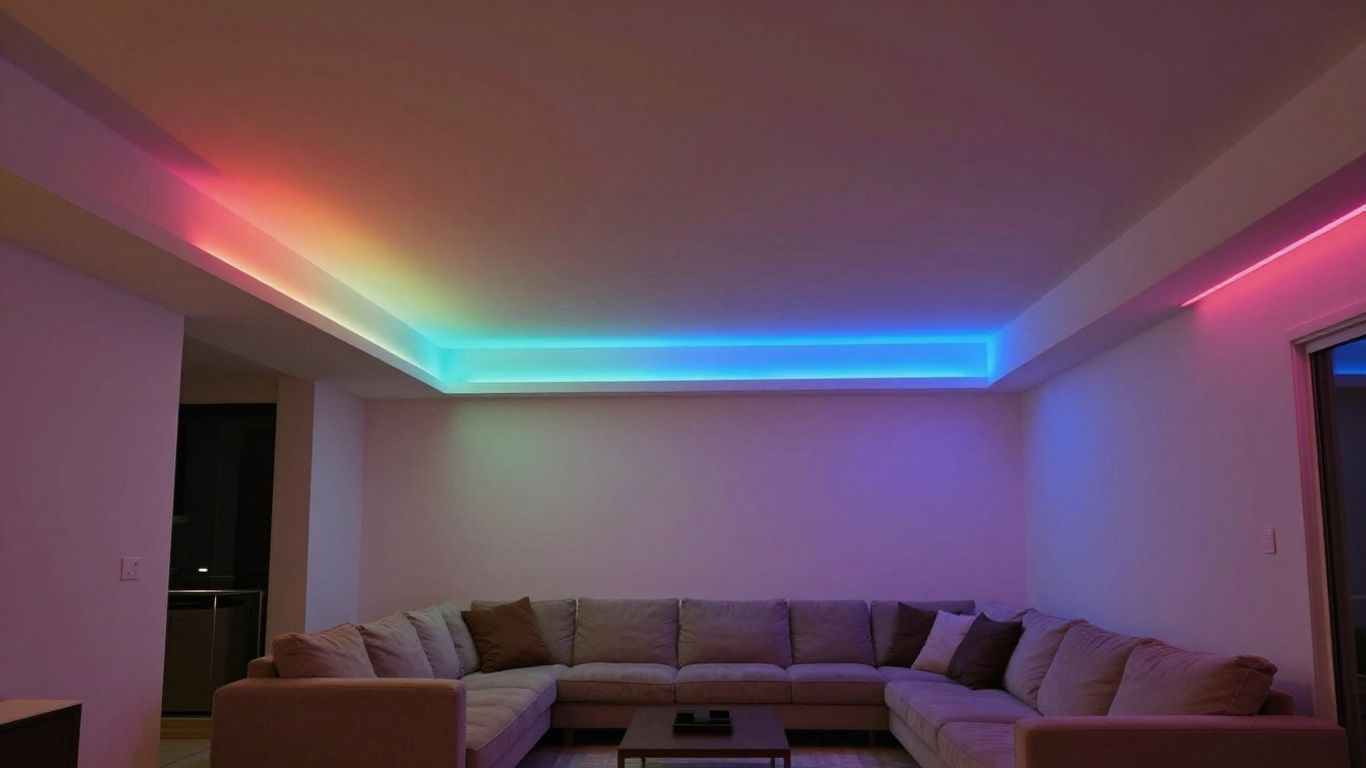
- Colour-Changing (RGB) LED Strips: These are the fun ones. RGB stands for Red, Green, and Blue. By mixing these three colours, the strip can produce a whole spectrum of other colours. You can make it red, then green, then blue, or purple, yellow, and loads in between. They're brilliant for setting different moods or for parties.
- RGBW LED Strips: These are like the RGB ones, but they have an extra white LED chip. This means you can get a much better quality white light, not just the mixed white you get from RGB. If you want both colourful options and a really good white light, these are the ones to go for.
- CCT Adjustable LED Strips: CCT stands for Correlated Colour Temperature. These strips let you change the shade of white light. You can switch between a warm, cosy white and a cool, bright white, all from the same strip. This gives you a lot of flexibility depending on the time of day or what you're doing in the room.
Key Benefits of Using LED Strips
Why bother with LED strips for your ceiling? Well, there are quite a few good reasons:
- Energy Efficiency: LEDs use a lot less electricity than older types of bulbs. This means your energy bills should go down, which is always a bonus. Plus, they last for ages, so you won't be constantly replacing them.
- Versatility: You can bend and cut most LED strips to fit awkward corners or specific lengths. This makes them really adaptable for all sorts of ceiling designs, whether it's a simple straight line or something a bit more complicated.
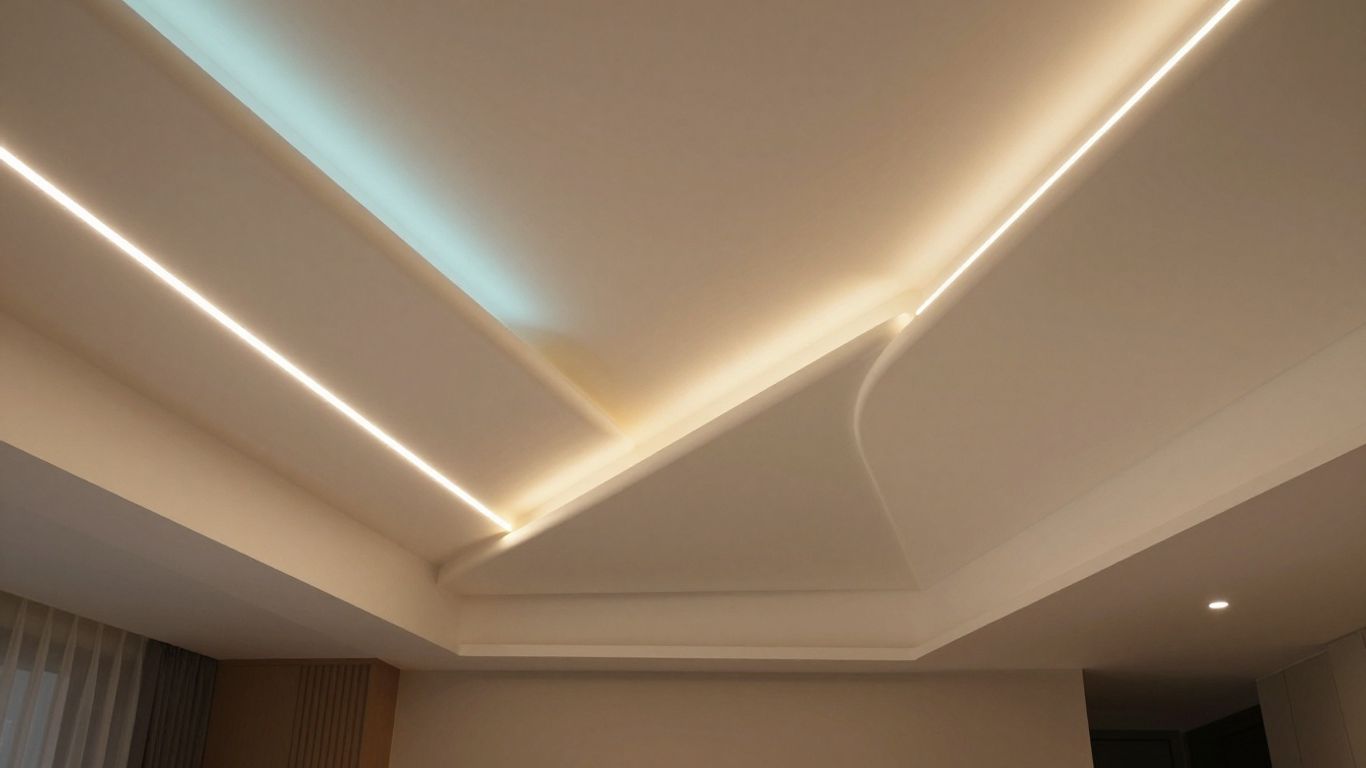
- Aesthetics: They give off a nice, even light that can look really sleek and modern. You can hide them in coving or behind features to create a 'floating' light effect, which looks pretty impressive.
- Customisation: With the colour-changing and CCT adjustable options, you can really tailor the lighting to your mood or the occasion. Want a bright, energising light for working, or a soft, warm glow for relaxing? You can have it.
Choosing the Right Brightness and Colour Temperature
Getting the brightness and colour temperature right is super important. Too bright and it's glaring; too dim and it's useless. The wrong colour temperature can make a room feel cold or dingy.
Here's a quick rundown:
- Brightness (Lumens): This is how much light the strip gives off. For general ceiling lighting, you'll want something fairly bright. For accent lighting, like highlighting a feature, you'll want something dimmer. It's often measured in lumens per metre (lm/m). A typical living room might need around 200-300 lm/m for ambient light, but you might want more if it's the only light source.
-
Colour Temperature (Kelvin): This describes the 'warmth' or 'coolness' of the white light.
- Warm White (2700K - 3000K): This is like the light from traditional incandescent bulbs. It's cosy and relaxing, good for bedrooms or living rooms where you want to chill out.
- Neutral White (3500K - 4000K): This is a bit brighter and cleaner. It's good for kitchens, bathrooms, or offices where you need clear, natural-looking light.
- Cool White (5000K - 6500K): This is a very bright, bluish-white light. It's often used in commercial settings or garages for maximum visibility, but can feel a bit stark for a home.
When you're picking out your LED strips, think about what you'll actually be doing in the room. If it's a space for relaxing, go for warmer tones. If it's a workspace, cooler, brighter light might be better. You can always get strips that let you adjust this, which is a nice bit of flexibility.
Planning Your Ceiling LED Strip Lighting Installation
Right then, before you even think about sticking anything to the ceiling, a bit of planning goes a long way. Getting this bit wrong can lead to all sorts of headaches later on, like not having enough light, or worse, having strips that don't quite fit where you wanted them. So, let's break down what you need to consider.
Accurate Ceiling Measurements
First things first, grab a tape measure. You need to know exactly how much ceiling edge you're going to cover. If you're just doing a simple rectangle, measure each side and add them up. If you've got a more complicated ceiling, maybe with coving or some fancy architectural bits, break it down into smaller, manageable sections. Measure each bit and then sum them up. It's always better to have a little bit extra than to run short halfway through.
Designing Your LED Strip Layout
Think about the look you're going for. Do you want the light to shine directly down, or would you prefer a softer, indirect glow? You can achieve this by pointing the strips upwards into a cove or recess. Also, consider if you want straight lines or if you're feeling adventurous and want to follow a curve. Most LED strips are pretty flexible, which is great for unique shapes. If you want a really smooth, even light, you might want to look into using aluminium channels or diffusers. These hide the individual LEDs and spread the light out nicely.
Determining Power Requirements
This is a bit of a maths bit, but it's important. Every metre of LED strip uses a certain amount of power (wattage). You need to find out what that is for the strips you're buying. Then, multiply that by the total length of strip you're using. For example, if your strips use 10 watts per metre and you're installing 5 metres, you'll need at least a 50-watt power supply. It's a good idea to get one that's a bit more powerful than you strictly need, maybe 10-20% more, just to be safe and stop it from getting too hot.
Here's a quick look at how to estimate:
| Strip Length (metres) | Wattage per Metre (W/m) | Total Wattage Needed (W) |
|---|---|---|
| 3 | 8 | 24 |
| 5 | 12 | 60 |
| 10 | 15 | 150 |
Always check the manufacturer's specifications for both the LED strips and the power supply to ensure they are compatible. Mismatched voltages or insufficient wattage can damage the lights or cause them to not work correctly.
Selecting the Ideal LED Strip Lights
Right then, choosing the right LED strips for your ceiling is where things get really interesting. It’s not just about grabbing any old strip; you’ve got a few decisions to make that’ll really shape how your room looks and feels. Think of it like picking out paint colours, but for light.
Single Colour vs. Colour-Changing Options
First up, do you want a steady, consistent glow or the ability to switch things up? Single-colour strips are your go-to if you know exactly the mood you want to create and stick with it. These usually come in shades of white, from a cosy warm white that feels like a traditional bulb, to a crisp cool white that’s great for a more modern, alert feel. They're generally simpler to set up and often a bit cheaper.
On the other hand, colour-changing strips, like RGB (Red, Green, Blue) or RGBW (which adds a dedicated white channel for better whites), are fantastic if you like to play with your lighting. You can set a calming blue for a movie night, a vibrant red for a party, or a clean white for when you need to focus. RGBW is a bit of a step up from basic RGB because it gives you a much purer white light, which is handy if you plan to use white light a lot.
- Single Colour: Simple, consistent light. Great for a fixed atmosphere.
- RGB: Offers millions of colour combinations. Fun for dynamic lighting.
- RGBW: Adds a dedicated white LED for better quality white light and more colour mixing.
Considering Waterproofing and Durability
Now, for ceilings, you might not think waterproofing is a big deal, but it’s worth considering, especially if your ceiling is in a bathroom or kitchen where moisture can be an issue. Most LED strips have an IP rating, which tells you how well they’re protected against dust and water. For general living areas, a lower IP rating is usually fine, but if there’s any chance of dampness, look for something like IP65 or higher. This just means they're built to last longer, even in trickier spots.
Durability also comes down to the quality of the strip itself. Cheaper strips might have fewer LEDs per metre, leading to uneven lighting or visible 'hotspots' where the individual LEDs are obvious. Higher-quality strips often have more LEDs packed in, giving a smoother, more continuous line of light. It’s worth spending a little more here for a better look.
Flexible Versus Rigid Strip Considerations
Most LED strips you'll find are flexible, which is brilliant for following the contours of your ceiling, going around corners, or fitting into coving. They're usually backed with an adhesive strip, making them pretty straightforward to stick in place. You can cut them to size at marked points, which is super handy for getting the exact length you need.
Rigid LED strips, on the other hand, are less common for general ceiling applications. They come in fixed lengths and are usually housed in aluminium profiles. While they offer a very clean, defined look and can be good for specific architectural features, they lack the adaptability of flexible strips. For most ceiling projects, especially if you're aiming for that indirect, cove lighting effect, flexible strips are definitely the way to go. They just offer so much more freedom in how you install them.
Step-by-Step Installation Guide
Right then, you've picked out your lights and planned where they're going. Now for the actual fitting! Don't worry, it's not as fiddly as it looks, especially with modern LED strips. Just take your time and follow these steps.
Preparing the Ceiling Surface
First things first, you need a clean surface for the sticky-back tape on the LED strips to actually stick to. Grab a damp cloth and give the ceiling area a good wipe down. Get rid of any dust, cobwebs, or greasy marks – especially if your kitchen ceiling is anything like mine! Let it dry completely before you do anything else. If you've recently painted, give that paint a good week or so to fully cure. Trying to stick lights to damp or uncured paint is just asking for trouble.
Connecting Power and Testing
Before you commit to sticking everything up, it's a good idea to connect your LED strips to the power supply and give them a test run. This way, you can catch any faulty strips or connection issues early on. If you're using multiple strips, connect them using the appropriate connectors. Make sure you match the positive (+) and negative (-) terminals up correctly – get this wrong and they just won't light up. The power supply will usually have red for positive and black for negative wires. Connect these to the corresponding points on your strip. Some people prefer soldering for a really solid connection, but most strips come with push-fit connectors these days, which are much simpler.
Securing and Hiding the Strips
Most LED strips have a strong adhesive backing. Carefully peel off a small section of the backing paper first. Line up the strip exactly where you want it, then press it firmly onto the ceiling. Work your way along, peeling the backing off gradually as you go. Try to keep it smooth and avoid any kinks or air bubbles. If you mess up and need to reposition, gently lift it off and try again before it's fully pressed down. For a really neat finish, consider using aluminium channels or diffusers. These not only hide the strip itself but also help spread the light more evenly, giving a softer glow. It makes a big difference to the overall look, honestly. You can find these channels at most good lighting suppliers, and they really help achieve that professional finish. It's worth looking into LED strip channels if you want that polished look.
Remember to always switch off the power at the mains before you start any electrical connections. Safety first, always!
Enhancing Your Space with LED Strip Lighting
So, you've got your LED strips installed, looking sharp around the ceiling perimeter. But what now? This is where the real fun begins – turning that basic lighting into something special. It’s not just about having light; it’s about using it to create a mood, highlight features, and make your room feel exactly how you want it to.
Creating Ambient and Accent Lighting
Think of ambient lighting as the general glow that sets the overall tone of a room. For ceilings, this often means a soft, diffused light that washes down the walls or creates a gentle halo effect. It’s perfect for winding down in the evening or for when you want a relaxed atmosphere. Accent lighting, on the other hand, is more focused. You can use it to draw attention to specific architectural features, artwork, or even just to add a bit of drama. For instance, a slightly brighter strip tucked just under a cornice could highlight the ceiling's texture, while a different colour could be used to subtly mark out a seating area.
Here are a few ideas to get you started:
- Soft Perimeter Glow: Run strips along the edge of the ceiling for a continuous, gentle light that makes the room feel bigger.
- Cove Lighting: If you have a recessed ceiling or a bulkhead, tucking strips inside creates a beautiful, indirect light that bounces off the ceiling surface.
- Highlighting Features: Use strips to outline a dropped ceiling section or a decorative element, making it stand out.
- Colour Washing: With colour-changing strips, you can wash walls with subtle hues to match your mood or the occasion.
Utilising Smart Features and Controls
This is where LED strips really shine, especially if you've opted for smart or colour-changing models. Forget fiddling with switches; modern LED systems offer a whole new level of control. You can often connect them to your home Wi-Fi, allowing you to control them via a smartphone app or even voice commands through smart assistants. This means you can:
- Adjust Brightness: Dim the lights for movie nights or brighten them for tasks.
- Change Colours: Switch between millions of colours to set the perfect mood – from a calming blue to a vibrant red for parties.
- Set Schedules: Program your lights to turn on or off at specific times, making your home look occupied even when you're out, or waking you up gently in the morning.
- Create Scenes: Save your favourite lighting combinations (e.g., 'Relax Mode' with warm, dim light; 'Party Mode' with dynamic colours) for instant recall.
The real beauty of smart LED strips is their adaptability. You're not just installing lights; you're installing a dynamic lighting system that can change with your needs and preferences throughout the day and night. It’s about making your home environment more responsive and personalised.
Maintaining Your Ceiling LED Strips
Good news – LED strips are pretty low-maintenance. They don't have filaments that burn out like old bulbs, so they tend to last a long time. However, a little care goes a long way to keep them looking and working their best.
- Dusting: Over time, dust can settle on the strips, slightly dimming their output. A gentle wipe with a dry, soft cloth every few months should do the trick. Avoid using harsh cleaning chemicals, as they can damage the strip or its protective coating.
- Check Connections: If you notice any flickering or sections not lighting up, it's worth checking that all connections are secure. Sometimes, vibrations can loosen things over time.
- Heat Management: While LEDs produce very little heat, it's still a good idea to ensure they aren't covered by thick insulation or placed directly against very hot surfaces. Good airflow helps them last longer.
Most of the time, your ceiling LED strips will just do their thing without much fuss, providing beautiful light for years to come.
Want to make your home look amazing? LED strip lights are a brilliant way to add a special touch to any room. They're easy to use and can change the whole feel of a space, whether you're lighting up a shelf or creating a cool vibe behind your TV. Discover how these lights can transform your home. Visit our website today to explore our range and find the perfect LED strips for your needs!
Wrapping Up Your Ceiling Lighting Project
So, there you have it. LED strip lights really can make a big difference to how your rooms look and feel, especially on the ceiling. They're not just about looking good, either; they're pretty good on the electricity bill too, which is always a bonus. Whether you've gone for a simple white glow or something a bit more colourful, getting them installed right means you'll have a nice bit of mood lighting for ages. It’s a straightforward way to give your place a bit of a refresh without needing to be a DIY expert. Just remember to plan it out, take your time with the fitting, and enjoy the new atmosphere you’ve created.
Frequently Asked Questions
Can I cut LED strip lights to fit my ceiling?
Yes, you certainly can. Most LED strip lights are designed to be cut at specific points, usually marked with a small scissor icon. Just make sure you cut on the marked lines to avoid damaging the strip. It's a great way to get the exact length you need for your ceiling.
How do I hide the wires and the LED strip on my ceiling?
To make things look neat, you can use special aluminium channels or diffusers. These not only hide the strips and wires for a cleaner look but also help protect the lights from dust and can spread the light more evenly. They're a bit like a neat little track for your lights.
What's the best way to stick LED strips to a textured ceiling?
Sticking lights to bumpy or textured ceilings can be tricky because the sticky back might not hold well. It's a good idea to test a small bit first. If it doesn't stick, using those aluminium channels mentioned earlier is a much better option for a secure fit.
Are LED strip lights good for my energy bills?
Definitely! LED strip lights are super energy-efficient. They use much less electricity than older types of bulbs for the same amount of light. So, yes, they can help you save a bit of money on your electricity costs.
How long do these LED strip lights usually last?
LED strip lights are built to last a long time. You can expect them to work for thousands of hours. Of course, how long they actually last can depend on how good the quality is and how often you use them, but generally, they're a long-term lighting solution.
Can I control the colour of my LED ceiling lights?
Absolutely! Many LED strip lights can change colours. You can get ones that do a whole rainbow of colours (called RGB) or even ones that can do colours plus a nice white light (RGBW). You can usually control them with a remote or even a smartphone app.

